In a cloud environment, where multiple users are accessing and managing cloud resources, there’s always the possibility of human error. 99% of cloud breaches will be caused by users error. Stop just putting your security policy on paper. This article will provide you with an overview of Azure Policy and how to create Azure policy to help govern your Azure environment.
Azure Policy: Enforcing Compliance & Governance
Creating a policy in Azure is a straightforward process that empowers users to enforce governance and compliance standards across their resources. Azure Policy allows you to define rules and constraints that resources must adhere to. By specifying criteria like resource types, regions, and parameters, you can ensure that your resources align with organizational guidelines. Azure Policy actions include auditing, remediation, and enforcing compliance. When resources deviate from defined policies, Azure Policy can trigger actions to bring them back into compliance automatically. This approach enables organizations to maintain consistent resource configurations, security standards, and operational best practices, ensuring a controlled and secure cloud environment.
Creating Azure policies is essential for enforcing governance and compliance in your Azure environment. To do so effectively and follow Azure policy best practices, you can follow these 10 easy steps to create policies in Azure. Start by logging into your Azure Portal, access policy definitions, and create a new policy definition tailored to your needs. Assign it to specific resources, review compliance regularly, and establish monitoring and auditing processes. For non-compliant resources, have a remediation plan in place. Document and communicate your policies to stakeholders, and continuously refine them to align with changing requirements, ensuring a robust and compliant Azure environment.
What is Azure Policy?
- Azure Policy is a service that allows you to define policies that implement and control a resource’s properties.
- It is a free feature in Azure that allows you to create policies and assign them to the resources. If these policies are not met, you receive alerts, and you can take action on those alerts.
- Azure Policy can be used to build a custom validation layer against deployments to prevent deviations from customer-defined rules. A minimal amount of extensibility is possible, and it is not a general-purpose Azure rules engine.
Benefits of Azure policy:
- It is a set of guardrails around all your resources to ensure cloud compliance, prevent misconfigurations, and follow a uniform resource governance plan.
- Having all your compliance data in one place will reduce the time you need to audit your environments.
- By implementing policies at the core of the Azure platform, you will be able to increase developer productivity and reduce external approval processes.
- You can control your cloud spending by controlling and optimizing it with the help of Azure policy.
During this lab, we will :
- Set up an Allowed Locations Azure policy that only allows resources to be created in Canada, Canada East, and Canada Central region.
- Test that only the Allowed location is used for resource creation; if the resource region is other than Canada, it should throw an error as per Azure policy definition.

Boost your earning potential with Azure expertise. Explore our certified Azure Courses for a high-paying career
- Explore Azure DevOps Certification
Let’s see how to create an Azure policy
- Login to Azure portal https://portal.azure.com
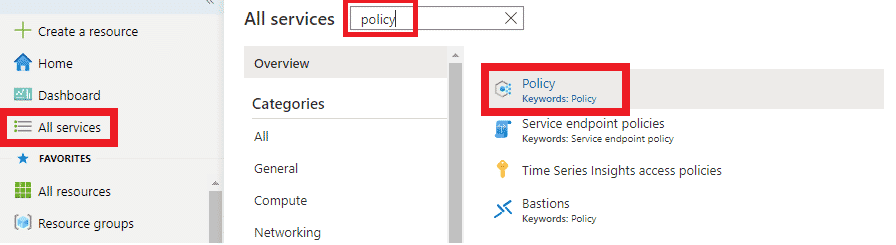
- In All Services, search for Policy and click on it.
Alternatively, you can search Policy in the Azure portal search directly and open the Policy blade.
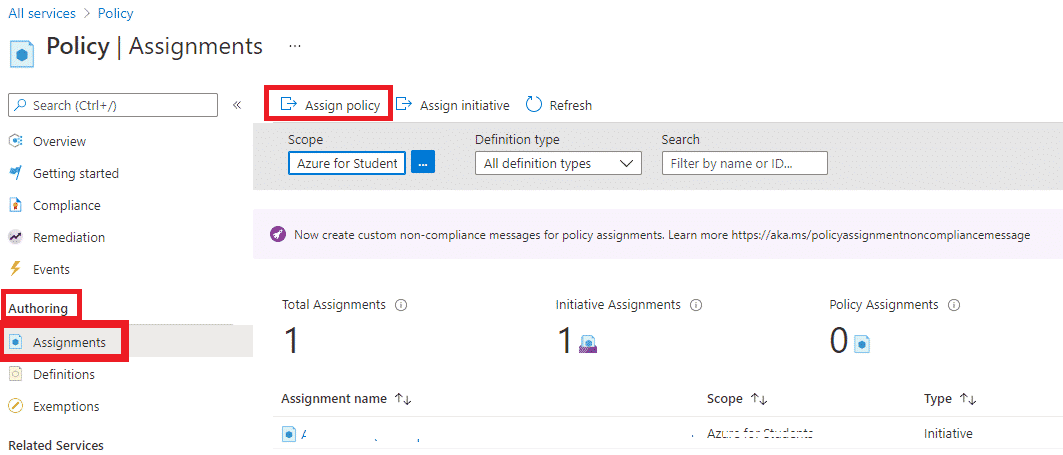
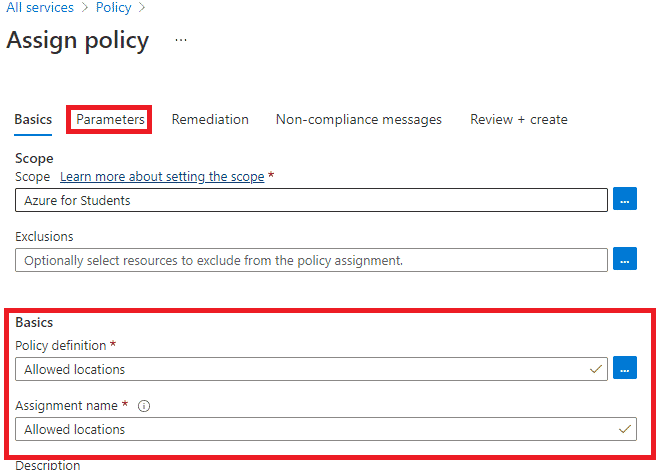
- Now go to Authoring and click Assignment, then on Assignment, click on Assign policy.
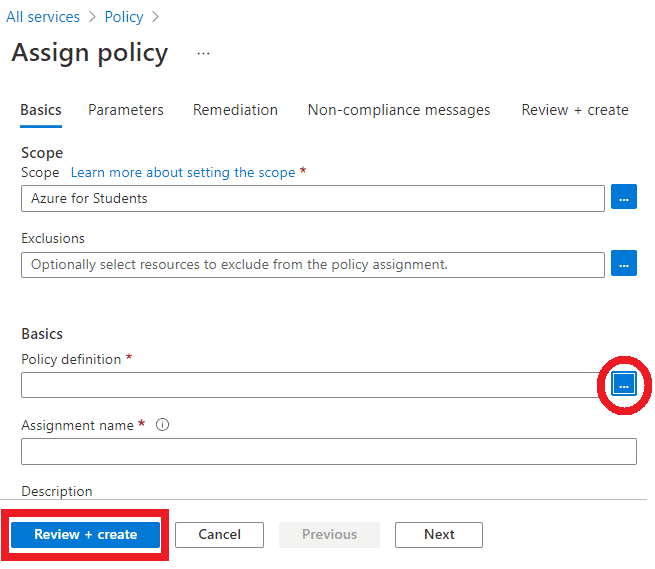
- On Assign policy blade under the basic select policy definition
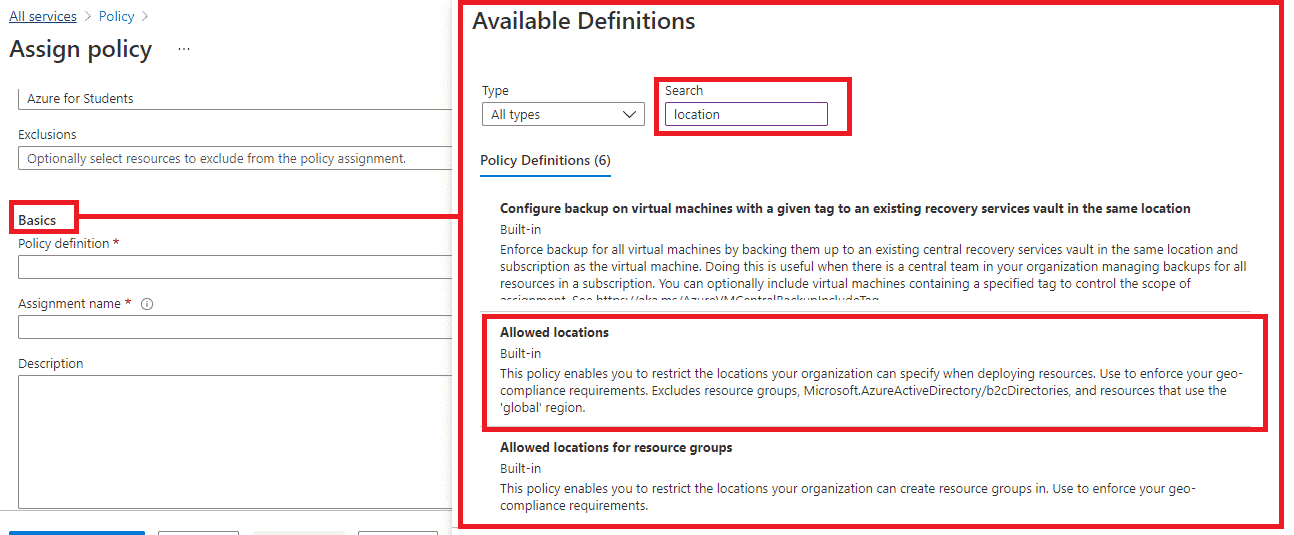
- On this page, Search for Location and select Allowed locations to create Azure policy definition.
- Back to assign a policy, here you will see all details are already filled, leave the rest of the tabs as a default and click on the Parameters tab.
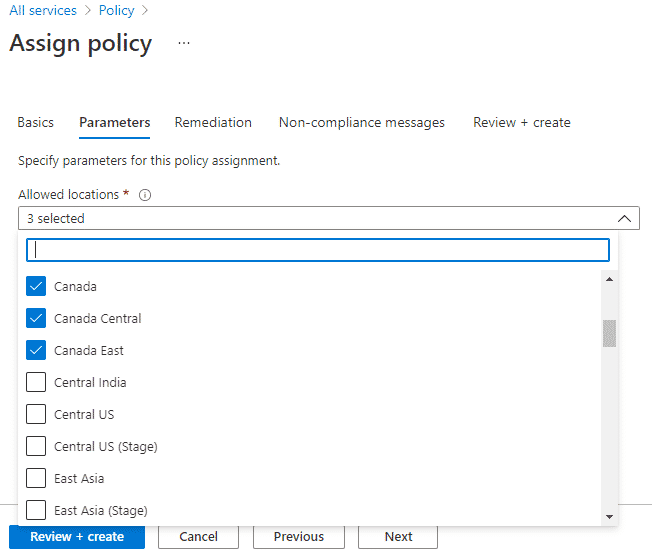
- On this blade, Select Allowed Locations to select the desired location as per the requirement here we have selected Canada, Canada Central, and Canada East, this means that the resources can only be created in these 3 regions.
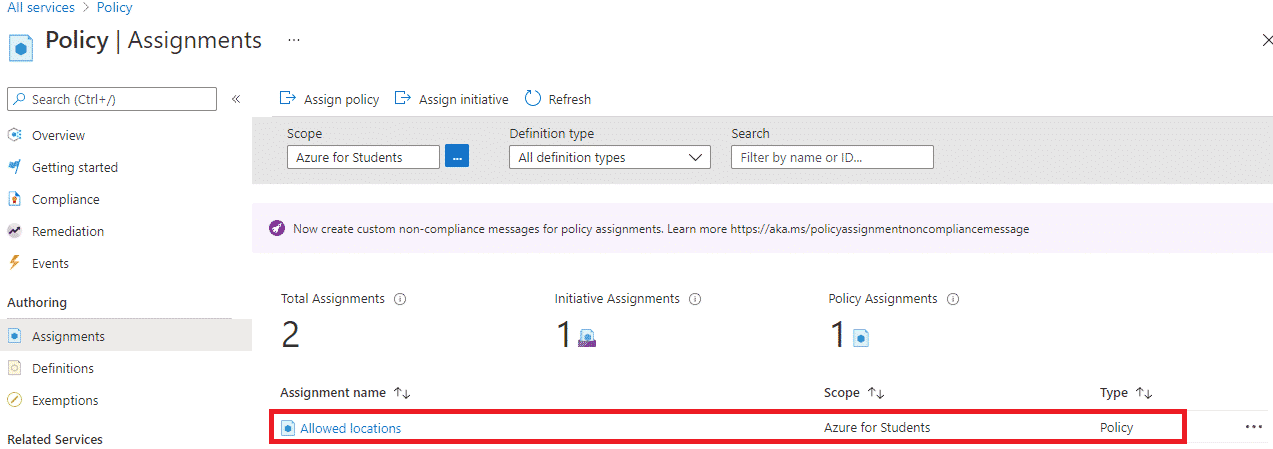
- Click on review+create. After validation completes, click on Create.
- Once the policy is created successfully, you can see the same under Assignment blade.
- In All Services blade search for and select the storage account
- On Storage, account blade, click on +create and fill in all details in the Basic tab as shown below picture now let’s test the Location policy by creating a storage accountTo know more about the Storage account and the creation of a storage account, you can check out our lab on how to create a storage account here. For now, please perform the below steps to create a storage account.
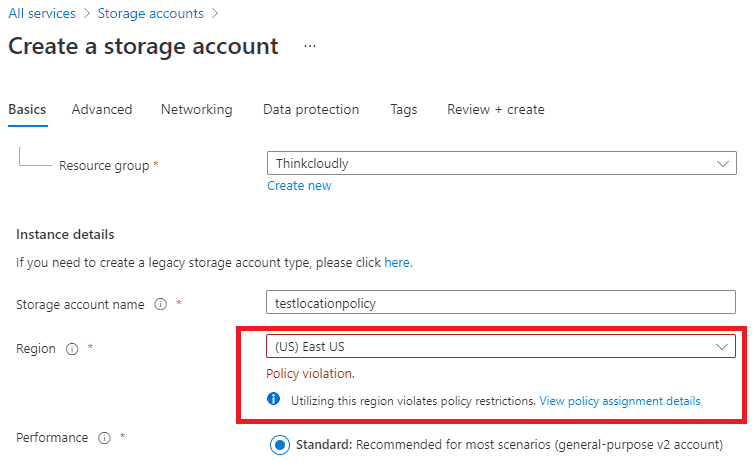
In the above picture, you can see that it gives us an error as a POLICY VIOLATION because the region is selected as (US) EAST US; however, we have created the Azure policy that only allows Canada, Canada Central and Canada East location. This means that the Azure policy for location is working fine.
- Now to fix this, change it to Canada as per policy and see if it will remove the policy violation error, and you can easily create the storage account now.
Congratulations!! We Finished the step of creating an Azure policy and tested it successfully.
AWS seems interesting to you. Explore our free resources, which will land you a job in your dream company.
- A blog over AWS IAM interview questions.
- A dictionary for AWS S3 interview questions.
- An article on AWS EC2 interview questions.
- An introductory guide for data ingestion in AWS.
- Program for AWS live projects training.
Don’t forget to register for free zoom webinars to boost your knowledge.
Conclusion
I hope this blog post was helpful in understanding the process of how to create an Azure Policy with 10 easy steps. Now that you have a better understanding, you can create lot many policies like this in your Azure portal and assign them to various resources to implement your organizational standards and compliance rules. Let us know if we can help you get started! To learn more on cloud computing check out our other blogs and specially designed courses.
Thanks for reading. I hope you enjoyed it. Our team will continue to provide ways to leverage Azure concepts!